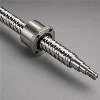
The complaint arrives about six months after delivery, and it always sounds the same. The axis was fine when the machine was commissioned. Now it has backlash, the servo current wanders during a constant-speed move, and the screw feels rough if you turn it by hand with the motor uncoupled.
The buyer wants to know why a precision screw wore out in six months. The usual answer is that it did not wear out. It was installed slightly crooked, and it has been grinding itself against that error on every stroke since day one.
Why small misalignment does large damage
A ball screw is built to take axial force. That is the entire design intent. Radial force - side load on the nut, or a shaft pulled off its natural line - is not something the raceway geometry handles well.
HIWIN's failure analysis describes the mechanism directly: when the centre line of the nut housing and the centre line of the bearing support housing are not aligned, radial load exists. Large errors bend the screw outright. Small errors do something more insidious - abnormal wear happens even when the misalignment is nowhere near enough to cause visible bending, and the accuracy of the assembly deteriorates rapidly (HIWIN Ballscrews Technical Information, Appendix A2-2).
The sting is in the follow-up sentence: the higher the preload set in the nut, the more demanding the alignment accuracy has to be.
Read that twice if you have just specified a preloaded double nut for a machine assembled by hand on a workshop floor. Preload is not a substitute for alignment. It raises the standard you have to hit.
There is a related failure at the shaft end. If the bearing seating face and the locknut thread axis are not perpendicular, tightening the nut bends the journal. The stated limit is that deflection at the shaft end, measured before and after the locknut is tightened, must not exceed 0.01 mm (HIWIN, Appendix A2-3). Past that, the end eventually breaks off.
A diagnostic sequence that isolates the cause
When an assembled axis has backlash, the useful question is not "how much" but "where". HIWIN publishes a four-step procedure that walks the load path from the screw outward, and it works because each step eliminates one component (HIWIN, Appendix A3):
Step 1. Glue a gauge ball into the centre hole at one end of the screw shaft. Rest the flat plate of a dial indicator against it and rotate the screw, watching axial movement of that gauge ball. If the bearing hub, the nut and the nut housing are all properly installed, movement should not exceed 0.003 mm.
Step 2. Indicate between the bearing housing and the bearing seat while rotating the screw. Any reading other than zero means the bearing hub is either not rigid enough or not properly installed.
Step 3. Indicate relative movement between the machine table and the nut housing.
Step 4. Indicate relative movement between the nut housing and the nut flange.
Only if all four come back clean should you conclude the screw itself needs more preload or more rigidity.
Most people skip straight to step four's conclusion and order a new screw. Then the new screw develops the same symptom, because the bracket that caused it is still bolted to the machine.
Three tolerances worth memorising
| Check | Limit | What it catches |
|---|---|---|
| Gauge-ball axial movement, screw rotating | 0.003 mm | Bearing hub, nut or housing installation error |
| Bearing housing to bearing seat, screw rotating | 0 (any reading is a fault) | Insufficient hub rigidity or bad fit |
| Shaft-end deflection before vs. after locknut tightening | 0.01 mm | Non-perpendicular bearing seat or locknut face |
Source: HIWIN Ballscrews Technical Information, Appendices A2 and A3.
Three hundredths, zero, one hundredth. None of these need special equipment - a decent dial indicator and a magnetic base cover all three.
What else gets in and causes the same symptoms
Misalignment is the big one, but two other installation faults produce nearly identical complaints.
Foreign material in the ball path. Packing material and anti-rust paper travel with the screw, and if the unit is unwrapped carelessly during installation, fragments end up in the raceway. Machining chips and dust do the same where wipers are not fitted. Either makes the balls slide instead of roll, which degrades accuracy, shortens life, and in bad cases seizes the nut completely.
Over-travel. Running the nut off the end of its usable stroke damages the return tube - it can collapse or break, after which the balls stop circulating smoothly, and they can break and score the raceway. It happens during setup, after a limit switch fails, or in a crash. An over-travelled screw should be inspected by the manufacturer before going back into service rather than just being run and hoped for.
The return tube is also fragile during handling. Hit it with a mallet while persuading the nut into its housing and you get the same collapse without ever running the machine.
Practical order of assembly
Mount and align the two end supports first, and get the shaft line established before the nut housing is fixed. Bolt the nut housing down last, with its fixings slightly loose, run the axis end to end by hand, and let the nut find its natural position before final tightening. If the housing has to be pulled sideways to get its bolts in, the bore is in the wrong place - fix the bracket, do not force it.
Check the centre height of the nut housing against the centre height of the support units on paper, before anything is machined. Shim the supports rather than the nut housing if they do not match, because shimming the housing tilts the nut flange.
Face the housing mounting surface flat. A nut flange bolted against a surface that is not flat conforms to that surface and drags the nut out of square.
Keep the wrapping on until the moment of installation, and fit wipers if there is any chance of chips.
When to call the supplier
If all four indicator checks pass and the axis still has unacceptable backlash, then the preload or the rigidity of the screw genuinely needs to increase, and that is a specification conversation rather than an installation one. Send the four readings with your enquiry - it turns a vague complaint into a solvable problem, and it usually saves a screw that was never faulty.
Related reading
- The Relationship Between Ball Screw Preload And Axial Clearance
- How To Align Linear Guideways During Installation
- Maintenance And Care Of Bearing Seats
- Ball Screw Support Unit BK12 FK15 EK10
Tianjin OuNaiDa supplies ball screws with matched support units, locknuts and nut housings so the mounting interfaces are checked before shipment. Send your axis arrangement and we will confirm the centre heights and shaft-end machining.
Precision Motion Components | Empowering Global Intelligent Manufacturing